
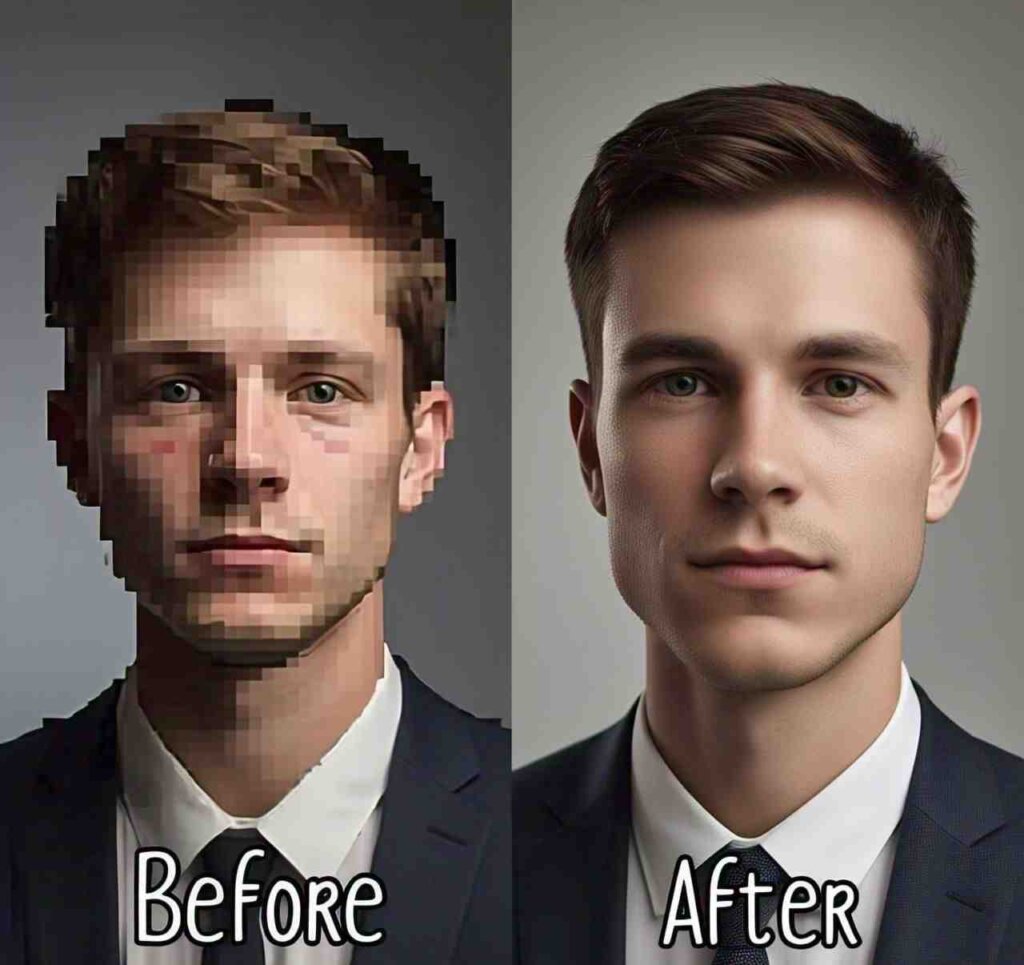
How to Smooth an Image Online for Free (Step-by-Step Guide)
Visual content is a game-changer in our digital world. From capturing attention on social media to creating polished graphics for presentations, high-quality visuals make all the difference. But often, raw images fall short of perfection—they can appear grainy, pixelated, or rough around the edges. That’s where image smoothing comes in. Luckily, you don’t need expensive software or advanced technical skills. This guide will show you how to smooth images online for free and help you get professional-quality results without breaking the bank.
Why Smooth Images Matter for Visual Appeal
Smooth images are more than just aesthetically pleasing; they create a sense of professionalism and polish. Whether you’re an influencer, marketer, or small business owner, enhancing photo quality online can elevate your brand and credibility. Images with a smooth finish often:
- It looks more professional and less distracting.
- Better highlight subjects in photographs.
- Improve readability of text overlays on graphics.
- Create a seamless and cohesive design for blogs, websites, or ads.
Your visuals will leave a lasting impression on your audience by smoothing inconsistencies like grain, rough textures, or artifacts.
Benefits of Using Online Tools for Image Smoothing
Gone are the days when photo editing required complex tools like Photoshop. Now, there are free online tools to smooth simple yet powerful images. Here’s why online platforms are the way to go:
- Accessible: No need for advanced photo editing knowledge—most image smoothing tools are intuitive and beginner-friendly.
- Cost-Effective: Many platforms offer free versions with basic (yet sufficient) features.
- AI-Powered Efficiency: Tools with AI-powered photo smoothing can deliver results in seconds.
- Cross-Device Compatibility: Edit your photos anywhere—whether on a desktop, tablet, or smartphone.
- No Installation Needed: Save space on your devices by using browser-based tools.
For creators of all skill levels, these tools make professional editing achievable without expensive software.
Step-by-Step Guide on How to Smooth Images Online for Free
Ready to retouch your visuals? Here’s how you can do it in just a few simple steps.
Step 1: Choose a Free Image Smoothing Tool Online
Some of the best free tools include:
- Fotor (great for AI-powered smoothing)
- BeFunky (quick and user-friendly interface)
- Pixlr (offering advanced editing options alongside smoothing)
- Photopea (an in-browser Photoshop alternative)
Choose one that fits your needs. Most of these platforms don’t even require you to sign up!
Step 2: Upload Your Image
- Visit your chosen platform and click “Upload Image.”
- Select the file you wish to smooth, considering file size restrictions (if any).
Step 3: Apply the Smoothing Feature
- Locate the “Image Smoothing” or “Retouch” option within the tool. These are often labeled clearly or grouped under a “Filters” or “Enhancements” section.
- Some tools, like AI image smoothers, automatically analyze your photo and remove rough textures without manual effort.
Step 4: Customize the Intensity
- Most editors allow you to adjust how intense the smoothing effect is. Move a slider to increase or decrease the impact depending on the look you’re going for.
- Avoid over-smoothing, as this can reduce the natural feel of your image.
Step 5: Export Your Smoothed Image
- Once you are satisfied with the results, export your image in the desired format (JPEG or PNG are most common). Most tools also offer free high-resolution download options.
Comparison of the Best Free Online Tools to Smooth Images
Which platform to try first? Here’s a quick comparison to help:
| Tool | Best For | Features | Cost |
| Fotor | AI-Powered Smoothing | Fast & automatic, additional filters | Free (basic) |
| BeFunky | Ease of Use | Simple interface, one-tap smoothing | Free (basic) |
| Pixlr | Versatility | Multiple tools, rich editing options | Free with ads |
| Photopea | Advanced Editing | Photoshop-like, extensive features | Completely free |
Choose the one that fits your editing needs and expertise level.
Tips for Achieving the Best Results
- Start with a High-Quality Image: The better the original photo, the easier it is to smooth imperfections without losing detail.
- Avoid Over-Smoothing: While tempting, too much smoothing can lead to unnatural results. Balance is key.
- Light Adjustments Post-Smoothing: Enhance brightness/contrast afterward to improve the overall look.
- Use a Stable Internet Connection: This ensures faster uploads and real-time adjustments on any online tool.
Pro tip: If your tool allows, experiment with sharpening effects to balance out overly blurred areas after smoothing.
Addressing Common Issues and Troubleshooting
Why does my image look blurry after smoothing?
Over-smoothing can sometimes blur essential details. Reduce the effect intensity or combine smoothing with sharpening tools.
Can I smooth a low-resolution image?
While possible, smoothing a low-res image often amplifies imperfections. Prioritize using higher-resolution images for editing.
My file is too large to upload. What should I do?
Free tools often come with limits on file size. Use compression tools like TinyPNG to reduce file size without significant quality loss.
Smooth Images and Their SEO Impact
You may not know that smoothed images can improve website loading speed and SEO. Here’s how:
- Better Compression: Smoothed images are more straightforward to compress without noticeable visual loss, which decreases file size.
- Improved UX: High-quality, smooth visuals enhance user experience, reducing bounce rates.
- Enhanced Mobile Speed: Large, rough images can slow mobile loading times. Smooth, optimized images perform better across devices.
The result? Faster performance and improved search engine rankings.
Legal and Ethical Considerations When Using Smoothed Images
Before uploading or editing your images, keep these factors in mind:
- Ownership: Ensure you have the right to edit and use the image, especially for commercial purposes.
- Attribution: For stock photos, check if attribution is required.
- Avoid Misrepresentation: Be ethical—over-editing images for ads can mislead customers.
Responsible editing preserves trust and integrity for creators and brands.
Wrap-Up: Start Smoothing Your Images Today
Smooth images are essential for creating polished visuals that captivate audiences. The rise of AI-powered image smoother tools and other free online photo editing platforms makes achieving professional results more effortless than ever. Following the step-by-step guide above, even beginners can take their visuals to the next level.
Whether you’re a blogger, influencer, or business owner, try smoothing an image online for free today. It’s time to leave pixelation and grain in the past and embrace a future of seamless, high-quality visuals!
Want to explore the best tools for your editing needs? Check out our recommended list and elevate your content effortlessly.


